nomad 가지고 놀기 (삽질기)
목표
테스트용 nomad 서버를 생성하고, 여러 기능들을 확인해 봅니다.
nomad 설치
AWS AMI 인스턴스를 생성합니다.
메모리는 1G 로 합니다.
내 IP 로부터의 모든 접속을 허용하도록 보안그룹을 설정해 줍니다.
아래 명령으로 nomad 를 설치해 줍니다.
wget https://releases.hashicorp.com/nomad/1.1.3/nomad_1.1.3_linux_amd64.zip
unzip nomad_1.1.3_linux_amd64.zip
sudo mv nomad /usr/bin/

nomad version
테스트용이므로, 한 서버에 Server/Client 를 한번에 활성화 합니다.
mkdir -p nomad/config

vi nomad/config/nomad.hcl
-----------------------------------------
datacenter = "dc1"
data_dir   = "/home/ec2-user/nomad/data"
bind_addr  = "0.0.0.0"

server {
  enabled          = true
  bootstrap_expect = 1
}

client {
  enabled           = true
}
-----------------------------------------
nomad Server/Client 를 생성합니다.
nomad client 는 root 권한이 필요합니다.
sudo nomad agent -config=nomad/config/nomad.hcl
==> WARNING: Bootstrap mode enabled! Potentially unsafe operation.
==> Loaded configuration from /home/ec2-user/nomad/conf/nomad.hcl
==> Starting Nomad agent...
==> Nomad agent configuration:

       Advertise Addrs: HTTP: 172.31.9.202:4646; RPC: 172.31.9.202:4647; Serf: 172.31.9.202:4648
            Bind Addrs: HTTP: 0.0.0.0:4646; RPC: 0.0.0.0:4647; Serf: 0.0.0.0:4648
                Client: true
             Log Level: INFO
                Region: global (DC: dc1)
                Server: true
               Version: 1.1.3

==> Nomad agent started! Log data will stream in below:

    // skip logs
    2021-08-10T13:21:08.439Z [INFO]  client: node registration complete
http://<nomad 서버 퍼블릭 아이피>:4646/ 에 브라우저로 접속해 보면 웹UI 를 확인할 수 있습니다.
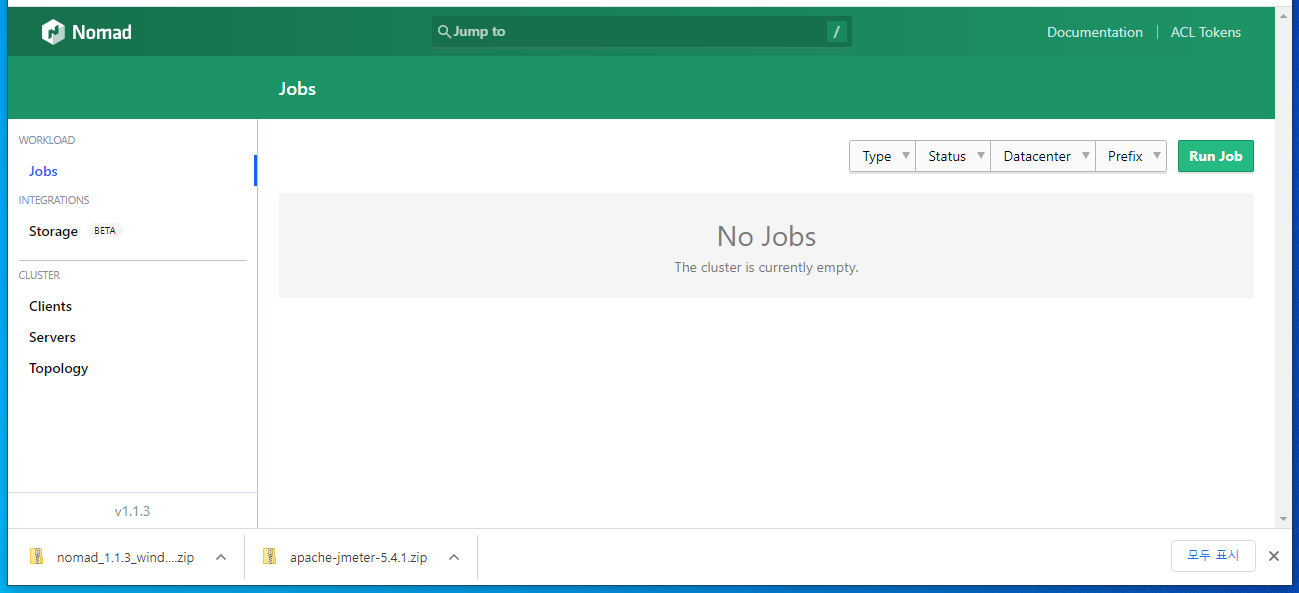
Job 생성
웹UI 에서 Job 을 생성하는 것도 가능하지만, CLI 에서 생성합니다.
JDK 11 을 설치합니다.
sudo yum install java-11-amazon-corretto-headless -y
java -version
JDK 설치 후 JDK 를 인식시키기 위해,
nomad server 를 재시작합니다.
vi hello.nomadjob "hello" {
datacenters = ["dc1"]
type = "service"
group "helloGroup" {
network {
port "lb" { static = 8080 }
}
# Define a task to run
task "helloTask" {
driver = "java"
config {
jar_path = "local/TestPublic-0.0.1-SNAPSHOT.jar"
jvm_options = ["-Xmx128m","-Xms128m"]
}
service {
name = "helloService"
port = "lb"
}
resources {
cpu = 500 # 500 Mhz
memory = 200 # 200 MB
}
# 원격에서 다운받아야 합니다.
artifact {
source = "https://github.com/skyer9/TestPublic/raw/master/TestPublic-0.0.1-SNAPSHOT.jar"
}
}
}
}nomad run hello.nomadnomad job status
ID Type Priority Status Submit Date
hello service 50 running 2021-08-11T12:32:25Znomad job status hello
ID = hello
Name = hello
Submit Date = 2021-08-11T12:32:25Z
Type = service
Priority = 50
Datacenters = dc1
Namespace = default
Status = running
Periodic = false
Parameterized = false
Summary
Task Group Queued Starting Running Failed Complete Lost
helloGroup 0 0 1 18 1 0
Latest Deployment
ID = c4a7c82c
Status = successful
Description = Deployment completed successfully
Deployed
Task Group Desired Placed Healthy Unhealthy Progress Deadline
helloGroup 1 1 1 0 2021-08-11T12:42:42Z
Allocations
ID Node ID Task Group Version Desired Status Created Modified
69efa88a 09537228 helloGroup 6 run running 6m8s ago 5m52s agohttp://<nomad 서버 퍼블릭 아이피>:8080/hello 에 접속하면,
애플리케이션이 작동하는 것을 확인할 수 있습니다.
포트가 고정이면?
포트가 고정이다?
Client 노드에 메모리가 많이 남아도,
포트충돌 때문에 애플리케이션을 두개 이상 못 올린다……
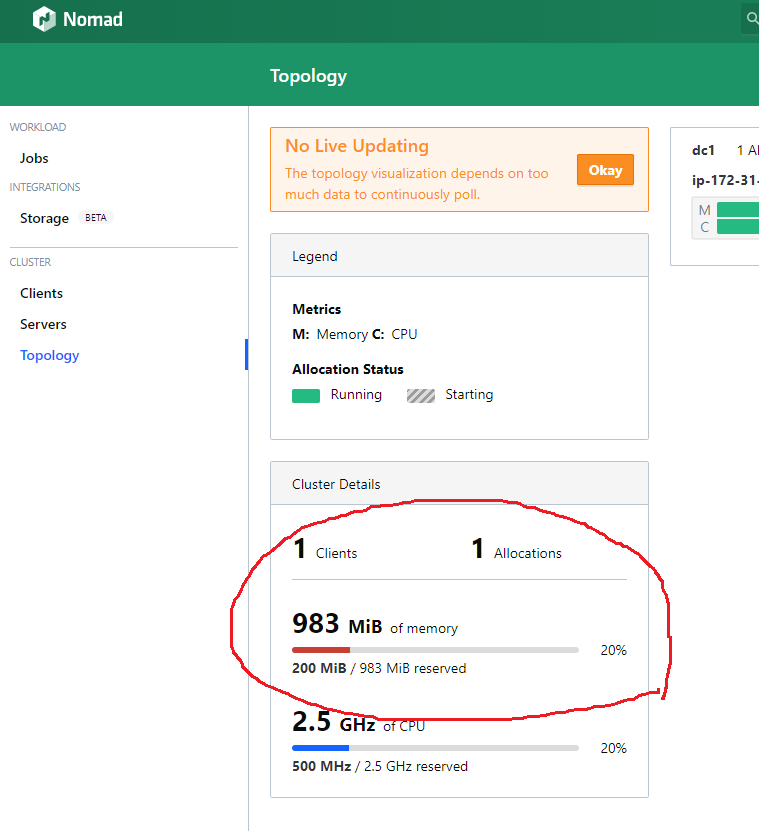
그래서, nomad 는 포트를 랜덤할당 하는 것이 디폴트입니다.
포트 랜덤할당
port "http" {}, port = "http" 로 포트를 랜덤할당 하도록 합니다.
vi hello.nomadjob "hello" {
datacenters = ["dc1"]
type = "service"
group "helloGroup" {
network {
port "http" {} # 포트 랜덤할당
port "https" {} # 포트 랜덤할당
# port "lb" { static = 8080 }
}
count = 1
# Define a task to run
task "helloTask" {
driver = "java"
config {
jar_path = "local/TestPublic-0.0.2-SNAPSHOT.jar"
jvm_options = ["-Xmx128m","-Xms128m"]
}
service {
name = "helloService"
# port = "lb"
port = "http"
}
resources {
cpu = 500 # 500 Mhz
memory = 200 # 200 MB
}
# 원격에서 다운받아야 합니다.
artifact {
source = "https://github.com/skyer9/TestPublic/raw/master/TestPublic-0.0.2-SNAPSHOT.jar"
}
}
}
}스프링 부트 앱의 설정파일을 수정해 줍니다.
Nomad 는 NOMAD_HOST_PORT_http 또는 NOMAD_HOST_PORT_https 라는 환경변수에 할당된 포트를 보내줍니다.
보내준 포트로 서버를 설정합니다.
application.yml
server:
  port: ${NOMAD_HOST_PORT_http:8080}
nomad run hello.nomadnomad server 로그에서 아래 내용을 확인할 수 있습니다.
alloc_id=24e79171-cf3a-2712-9e38-782b8d775575 에서 alloc_id 를 확인할 수 있습니다.
2021-08-12T04:38:34.294Z [INFO]  client.alloc_runner.task_runner.task_hook.logmon.nomad: opening fifo: alloc_id=24e79171-cf3a-2712-9e38-782b8d775575 task=helloTask path=/home/ec2-user/nomad/data/alloc/24e79171-cf3a-2712-9e38-782b8d775575/alloc/logs/.helloTask.stdout.fifo @module=logmon timestamp=2021-08-12T04:38:34.294Z
2021-08-12T04:38:34.294Z [INFO]  client.alloc_runner.task_runner.task_hook.logmon.nomad: opening fifo: alloc_id=24e79171-cf3a-2712-9e38-782b8d775575 task=helloTask @module=logmon path=/home/ec2-user/nomad/data/alloc/24e79171-cf3a-2712-9e38-782b8d775575/alloc/logs/.helloTask.stderr.fifo timestamp=2021-08-12T04:38:34.294Z
확인된 alloc_id 로 로그를 확인할 수 있습니다.
nomad alloc logs 24e79171-cf3a-2712-9e38-782b8d775575

......
2021-08-12 04:38:42.169  INFO 1 --- [           main] o.s.b.w.embedded.tomcat.TomcatWebServer  : Tomcat started on port(s): 21660 (http) with context path ''
2021-08-12 04:38:42.204  INFO 1 --- [           main] c.e.testpublic.TestPublicApplication     : Started TestPublicApplication in 5.93 seconds (JVM running for 7.14)
애플리케이션 2개 이상 실행
2개 이상의 애플리케이션을 실행하기 위해서는 Consul 이 필요합니다.
Consul 을 설치하기 위해 Docker 를 설치해 줍니다.
sudo yum install docker -y
docker -v
sudo service docker start
sudo systemctl enable docker.service
# sudo docker run -d --name consul -p 8500:8500 -p 8600:8600/udp consul
sudo docker run -d --name consul -p 8500:8500 -p 8600:8600 -p 8600:8600/udp consul
# <서비스명>.service.dc1.consul.
dig @127.0.0.1 -p 8600 helloService.service.dc1.consul. ANYhttp://<인스턴스 퍼블릭 아이피>:8500/ 에 접속하면 Consul 의 웹UI 를 확인할 수 있습니다.
vi nomad/config/nomad.hcl
-----------------------------------------
datacenter = "dc1"
data_dir   = "/home/ec2-user/nomad/data"
bind_addr  = "0.0.0.0"

server {
  enabled          = true
  bootstrap_expect = 1
}

client {
  enabled           = true
}

# 디폴트 설정입니다.
# (설정파일에 추가할 필요는 없습니다.)
consul {
  address = "127.0.0.1:8500"

  server_service_name = "nomad"
  client_service_name = "nomad-client"

  auto_advertise = true

  server_auto_join = true
  client_auto_join = true
}
-----------------------------------------
count = 2 로 두개의 앱이 실행됩니다.
vi hello.nomadjob "hello" {
datacenters = ["dc1"]
type = "service"
group "helloGroup" {
network {
port "http" {}
port "https" {}
# port "lb" { static = 8080 }
}
count = 2
# Define a task to run
task "helloTask" {
driver = "java"
config {
jar_path = "local/TestPublic-0.0.2-SNAPSHOT.jar"
jvm_options = ["-Xmx128m","-Xms128m"]
}
service {
name = "helloService"
# port = "lb"
port = "http"
}
resources {
cpu = 500 # 500 Mhz
memory = 200 # 200 MB
}
# 원격에서 다운받아야 합니다.
artifact {
source = "https://github.com/skyer9/TestPublic/raw/master/TestPublic-0.0.2-SNAPSHOT.jar"
}
}
}
}두개의 앱이 실행됩니다.
nomad run hello.nomad아래 명령으로 로그파일의 경로를 확인할 수 있습니다.
ps -efH
......
root 3154 1 0 04:25 ? 00:00:00 /usr/sbin/sshd -D
root 3197 3154 0 04:26 ? 00:00:00 sshd: ec2-user [priv]
ec2-user 3231 3197 0 04:26 ? 00:00:00 sshd: ec2-user@pts/0
ec2-user 3232 3231 0 04:26 pts/0 00:00:00 -bash
root 6668 3232 0 05:05 pts/0 00:00:00 sudo nomad agent -config=nomad/config/nomad.hcl
root 6669 6668 3 05:05 pts/0 00:00:10 nomad agent -config=nomad/config/nomad.hcl
root 7122 6669 0 05:10 pts/0 00:00:00 /usr/bin/nomad logmon
root 7130 6669 0 05:10 pts/0 00:00:00 /usr/bin/nomad logmon
root 7138 6669 0 05:10 ? 00:00:00 /usr/bin/nomad executor {"LogFile":"/home/ec2-user/nomad/data/alloc/cd67a9b6-6512-f4d0-98c0-2490de85cc72/helloTask/executor.out","LogLevel":"debug","FSIsolation":true}
nobody 7172 7138 40 05:10 ? 00:00:02 /usr/lib/jvm/java-11-amazon-corretto.x86_64/bin/java -Xmx128m -Xms128m -jar local/TestPublic-0.0.2-SNAPSHOT.jar
root 7143 6669 0 05:10 ? 00:00:00 /usr/bin/nomad executor {"LogFile":"/home/ec2-user/nomad/data/alloc/1eb14579-f0ab-4310-5b92-36d16c2b3cab/helloTask/executor.out","LogLevel":"debug","FSIsolation":true}
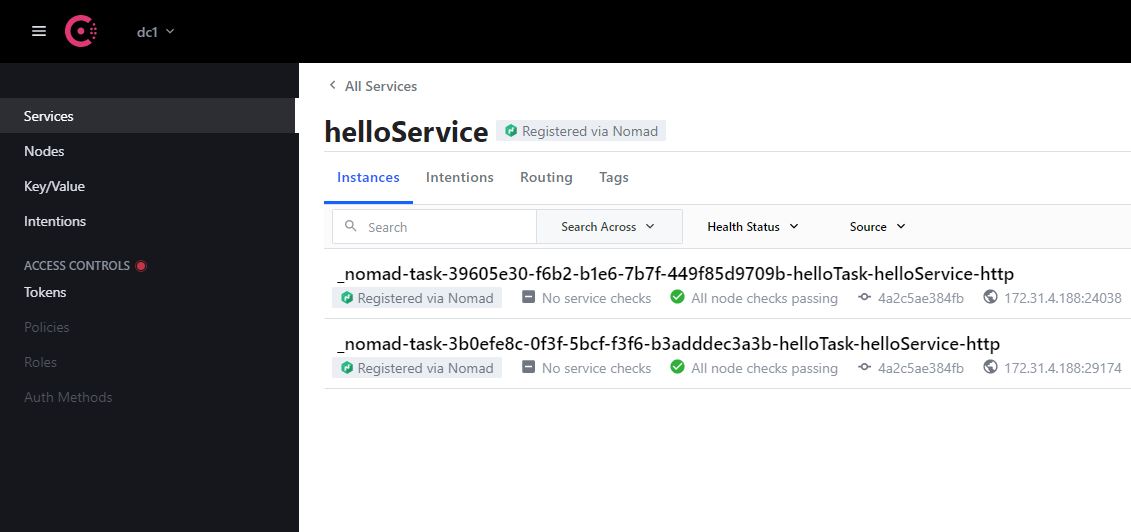
nobody 7205 7143 40 05:10 ? 00:00:02 /usr/lib/jvm/java-11-amazon-corretto.x86_64/bin/java -Xmx128m -Xms128m -jar local/TestPublic-0.0.2-SNAPSHOT.jarConsul 웹UI 를 이용해 실행중인 앱을 확인할 수 있습니다.
http://<인스턴스 퍼블릭 아이피>:8500/
로드밸런싱 및 서비스 URL 생성
랜덤포트를 할당했기때문에 사용자가 접속하기 어려워졌습니다.
HAProxy 를 이용해 로드밸런싱 및 서비스 URL 생성 두가지 필요한 기능을 추가해 봅니다.
env, check 를 추가해 줍니다.
vi hello.nomadjob "hello" {
datacenters = ["dc1"]
type = "service"
group "helloGroup" {
network {
port "http" {}
port "https" {}
# port "lb" { static = 8080 }
}
count = 2
# Define a task to run
task "helloTask" {
driver = "java"
config {
jar_path = "local/TestPublic-0.0.2-SNAPSHOT.jar"
jvm_options = ["-Xmx128m","-Xms128m"]
}
env {
PORT = "${NOMAD_PORT_http}"
NODE_IP = "${NOMAD_IP_http}"
}
service {
name = "helloService"
# port = "lb"
port = "http"
check {
type = "http"
path = "/hello" # health check 용 url
interval = "2s"
timeout = "2s"
}
}
resources {
cpu = 500 # 500 Mhz
memory = 200 # 200 MB
}
# 원격에서 다운받아야 합니다.
artifact {
source = "https://github.com/skyer9/TestPublic/raw/master/TestPublic-0.0.2-SNAPSHOT.jar"
}
}
}
}vi haproxy.nomadjob "haproxy" {
region = "global"
datacenters = ["dc1"]
type = "service"
group "haproxy" {
count = 1
network {
port "http" {
static = 8080
}
port "haproxy_ui" {
static = 1936
}
}
task "haproxy" {
driver = "docker"
config {
image = "haproxy:2.0"
network_mode = "host"
volumes = [
"local/haproxy.cfg:/usr/local/etc/haproxy/haproxy.cfg",
]
}
service {
name = "haproxy"
check {
name = "alive"
type = "tcp"
port = "http"
interval = "10s"
timeout = "2s"
}
}
template {
data = <<EOF
defaults
mode http
timeout connect 5s
timeout client 1m
timeout server 1m
frontend stats
bind *:1936
stats uri /
stats show-legends
no log
frontend http_front
bind *:8080
default_backend http_back
backend http_back
balance roundrobin
server-template mywebapp 1-10 _helloservice._tcp.service.consul resolvers consul resolve-opts allow-dup-ip resolve-prefer ipv4 check
resolvers consul
nameserver consul 127.0.0.1:8600
accepted_payload_size 8192
hold valid 5s
EOF
destination = "local/haproxy.cfg"
}
resources {
cpu = 200
memory = 128
}
}
}
}nomad run hello.nomad
nomad run haproxy.nomad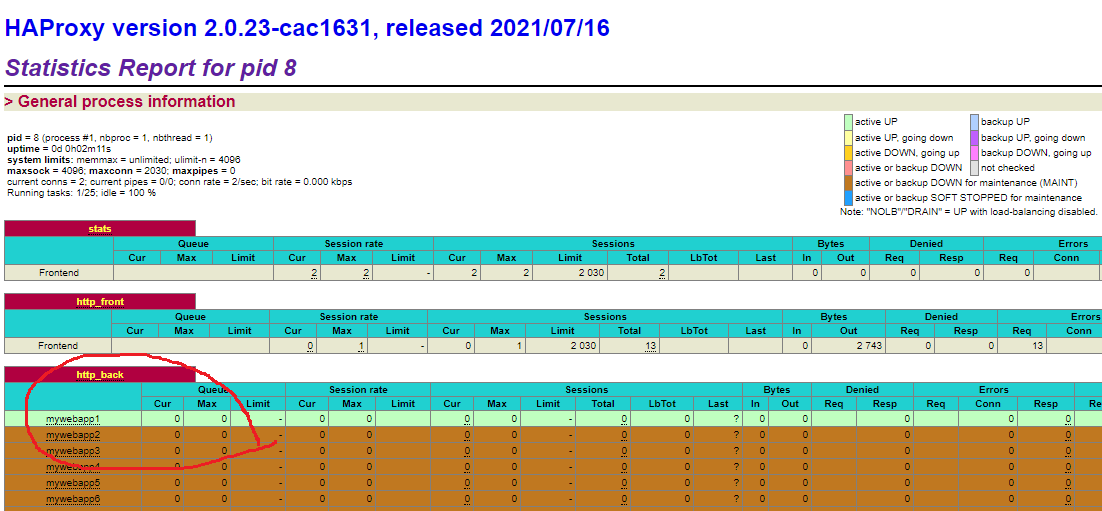
http://<인스턴스 퍼블릭 아이피>:1936/ 에 접속하면 haproxy 에서 인식한 것을 확인할 수 있습니다.
http://<인스턴스 퍼블릭 아이피>:8080/hello 에 접속하여 8080 포트에서 서비스를 확인할 수 있습니다.
TODO
이 클러스터를 2000대 설치해야 한다면 bash 로 노가다를 해야 하나?
Pingback: Jenkins Github Nomad 를 이용한 CI/CD 시스템 구축 – 상구리의 기술 블로그