Spring MVC Web Service 생성하기
목표
HTML 페이지를 제공하는 웹서비스를 생성합니다.
프로젝트 생성
Hello, World! 프로젝트 생성하기 를 참조해서 신규 프로젝트를 생성합니다.
의존성 추가
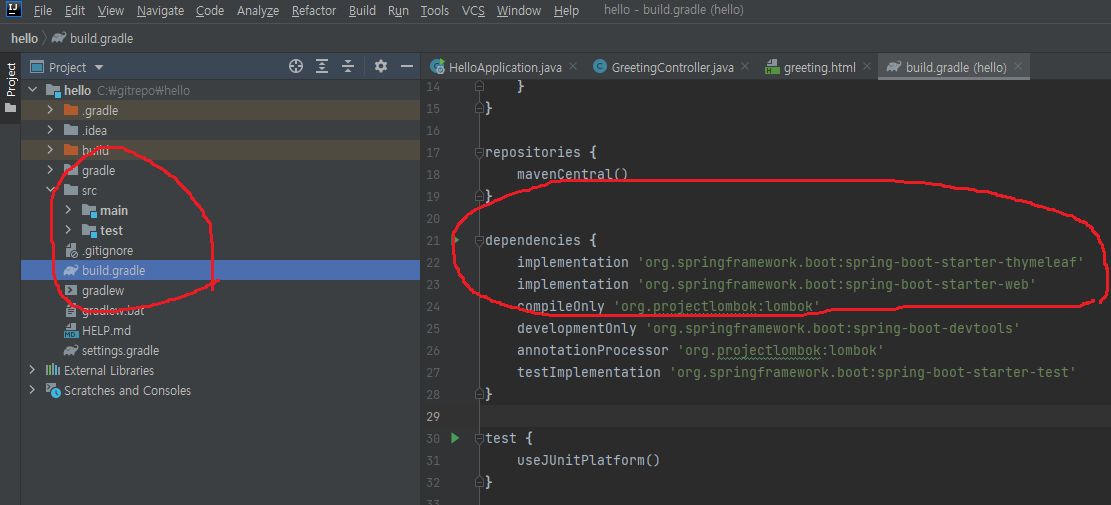
build.gradle 을 열고 thymeleaf 를 추가합니다.
dependencies {
    implementation 'org.springframework.boot:spring-boot-starter-thymeleaf'
    implementation 'org.springframework.boot:spring-boot-starter-web'
    compileOnly 'org.projectlombok:lombok'
    developmentOnly 'org.springframework.boot:spring-boot-devtools'
    annotationProcessor 'org.projectlombok:lombok'
    testImplementation 'org.springframework.boot:spring-boot-starter-test'
}
파일 추가
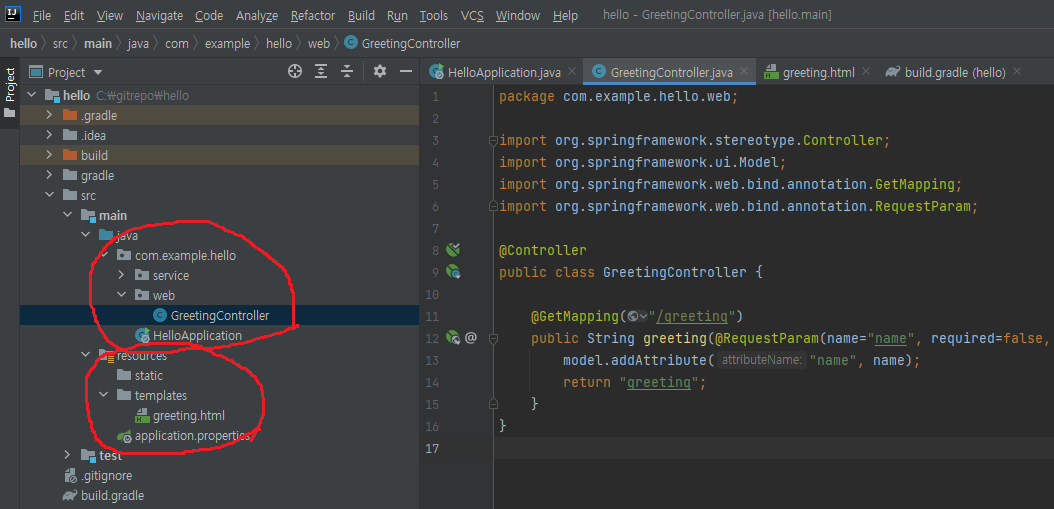
GreetingController.java
@Controller
public class GreetingController {

    @GetMapping("/greeting")
    public String greeting(@RequestParam(name="name", required=false, defaultValue="World") String name, Model model) {
        model.addAttribute("name", name);
        return "greeting";
    }
}
greeting.html
<!DOCTYPE HTML>
<html xmlns:th="http://www.thymeleaf.org" lang="en">
<head>
    <title>Getting Started: Serving Web Content</title>
    <meta http-equiv="Content-Type" content="text/html; charset=UTF-8" />
</head>
<body>
<p th:text="'Hello, ' + ${name} + '!'" />
</body>
</html>
프로젝트 실행
프로젝트 실행 후 아래의 링크를 열어 결과를 확인합니다.
http://localhost:8080/greeting
아래처럼 파라미터를 추가해 주면 브라우저의 내용이 변경됩니다.
http://localhost:8080/greeting?name=User
Spring Boot Devtools
html 파일을 수정해도 브라우저에 표시되는 내용은 변경되지 않습니다.
프로젝트를 재실행해야만 변경된 내용이 반영됩니다.
Spring Boot Devtools 는 컨테이너 재실행 없이도 브라우저에 표시되는 내용이 변경되도록 하는 기능을 제공합니다.
설정파일 수정
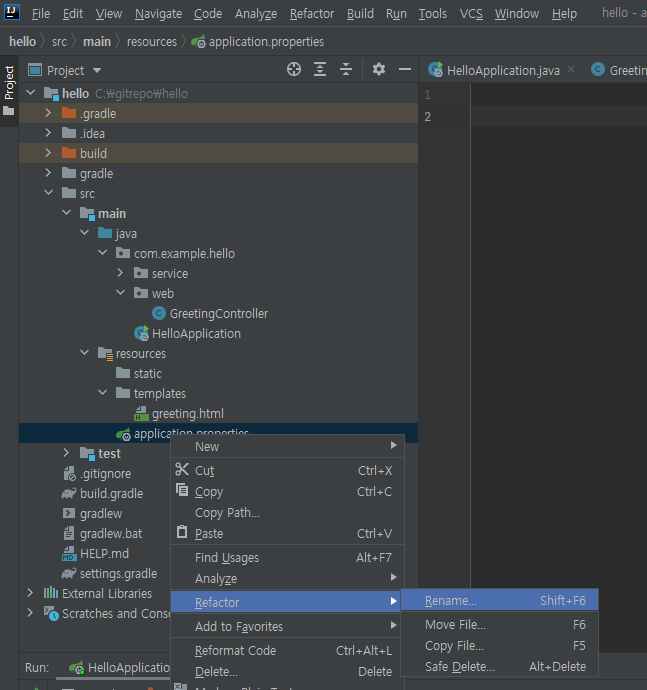
application.properties 의 파일명을 application.yml 로 변경합니다.
아래 내용을 추가해줍니다.
spring:
  thymeleaf:
    cache: false
IntelliJ 설정 변경
메뉴 : File -> Settings -> Build -> Compiler 에서 Build project automatically 를 체크합니다.
메뉴 : File -> Settings -> Build -> Build Tools -> Gradle 에서 Build and run using 을 IntelliJ IDEA 로 변경해 줍니다.
Ctrl+Shift+A 를 누르고, registry 입력 후, compiler.automake.allow.when.app.running 을 체크합니다.
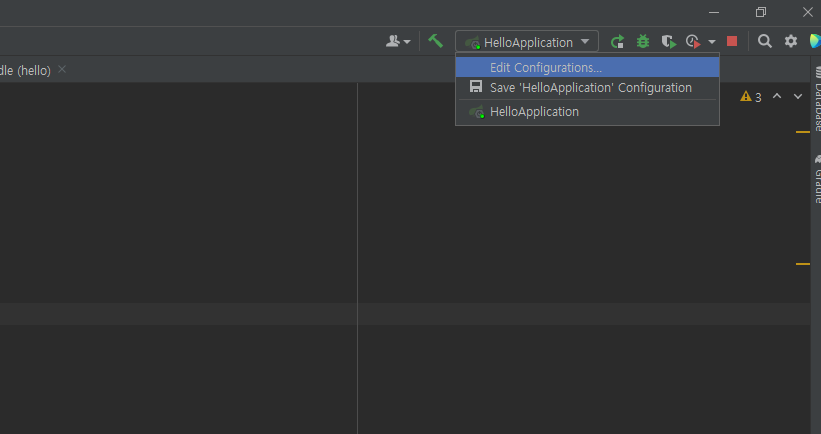
Run/Debug Configurations -> Running Application Update Policies 에서,
On ‘Update’ action 을 Hot swap classes and update trigger file if failed 로,
On frame deactivation 을 Update resources 로 설정합니다.
Pingback: Spring Boot 시작하기 – 상구리의 기술 블로그