Let’s Encrypt Wildcard 인증서 발급받기
주의사항
Wildcard 인증서를 자동갱신을 하기 위해서는,
자동갱신 기능을 지원하는 도메인 관리업체 (AWS 등) 에 도메인을 관리하고 있어야 합니다.
자동갱신 기능이 없는 경우, 1~2달에 한번씩 수동으로 갱신을 해주어야 합니다.
certbot 설치
sudo apt update && sudo apt upgrade
sudo apt install -y certbot
와일드 인증서 발급 (수동)
sudo certbot certonly --manual \
    --preferred-challenges=dns \
    --server https://acme-v02.api.letsencrypt.org/directory \
    --domain "*.example.com" --domain "example.com"
와일드 인증서를 발급받기 위해서는 도메인의 소유자임을 인증해야 합니다.
DNS 서버에 _acme-challenge.example.com 같은 서브도메인을 생성하라는 문구가 나오면,
_acme-challenge 서브도메인을 TXT 타입으로 생성하고 아래 문자열을 입력해 줍니다.
도메인 정보 변경이 반영되기를 기다려(1~10 분, DNS 서버설정에서 결정됨) 엔터를 입력해 주면 됩니다.
https://toolbox.googleapps.com/apps/dig/#TXT/_acme-challenge.example.com
위 링크 등을 이용해 반드시 도메인정보가 생성된 것을 확인한 후 엔터를 입력하세요.
도메인을 두개 추가하기 때문인지 위 절차를 한 번 더 하라고 합니다.
값은 대략 아래처럼 두줄로 입력하면 됩니다.
"XXXXXXXXXXXXXX"
"YYYYYYYYYYYYYY"
인증서 확인
/etc/letsencrypt/live/ 폴더에 생성된 인증서를 확인할 수 있습니다.
지동갱신 절차 개요
EC2 인스턴스에 Role 이 할당된 경우와 할당되지 않은 경우가 약간 다릅니다.
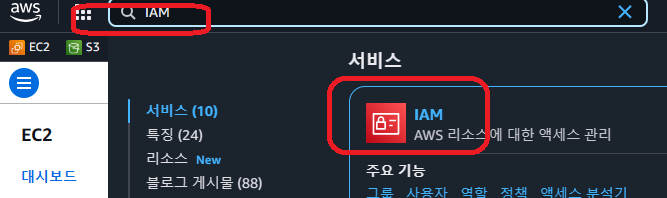
- AWS IAM 정책생성
- AWS IAM 계정생성
- 리눅스 인증서 갱신용 새 유저 생성
- 리눅스 서비스 등록
AWS IAM 정책생성
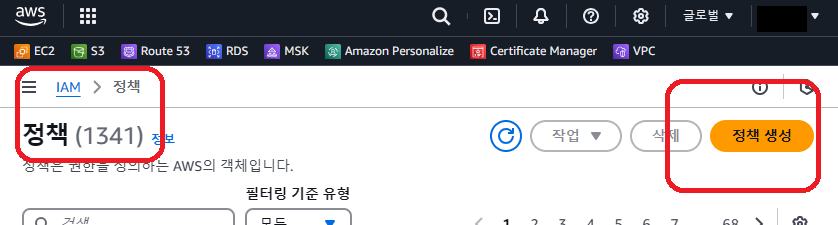
JSON 을 선택하고 아래 내용을 입력해 줍니다.
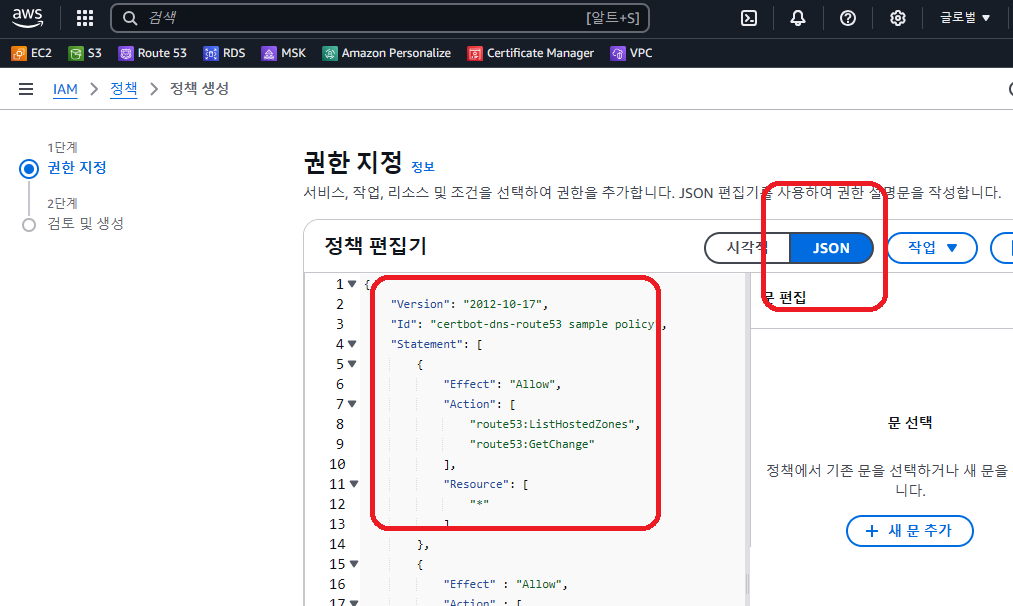
{
    "Version": "2012-10-17",
    "Id": "certbot-dns-route53 sample policy",
    "Statement": [
        {
            "Effect": "Allow",
            "Action": [
                "route53:ListHostedZones",
                "route53:GetChange"
            ],
            "Resource": [
                "*"
            ]
        },
        {
            "Effect" : "Allow",
            "Action" : [
                "route53:ChangeResourceRecordSets"
            ],
            "Resource" : [
                "arn:aws:route53:::hostedzone/YOURHOSTEDZONEID"
            ]
        }
    ]
}
화면 맨 아래 다음 을 클릭합니다.
정책 이름을 renewcert 로 입력하고 정책생성 버튼을 클릭합니다.
YOURHOSTEDZONEID 은 아래 명령중 aws route53 list-hosted-zones 에서 확인할 수 있는 아이디로 수정해 주어야 합니다.
AWS IAM 계정생성
EC2 인스턴스에서 실행중이고, EC2 인스턴스에 Role 이 할당되어 있는 경우, Role 에도 정책을 추가해 주어야 합니다.
왼쪽 메뉴에서 사용자를 클릭하고 사용자 생성 버튼을 클릭합니다.
사용자 이름을 입력하고 다음을 클릭합니다.
정책 직접 설정을 선택하고 위에서 생성한 정책을 검색해서 선택하고 다음을 클릭합니다.
사용자 생성 버튼을 클릭합니다.
왼쪽 메뉴에서 사용자를 클릭하고 방금 생성한 사용자를 검색해서 조회합니다.
액세스 키 만들기 를 클릭합니다.
Command Line interface(CLI) 를 선택하고 다음을 클릭합니다.
엑세스 키와 비밀 엑세스키를 메모장에 복사 붙여넣기합니다.
리눅스 인증서 갱신용 새 유저 생성
sudo apt-get update
sudo apt-get install python3-pip

# sudo pip3 install certbot-dns-route53
sudo apt install python3-certbot-dns-route53
renewhttps 유저를 생성하고 sudo 권한을 부여합니다.
sudo adduser renewhttps
sudo usermod -aG sudo renewhttps

sudo vi /etc/sudoers
# 맨 아래에 다음 라인을 추가합니다.
renewhttps      ALL=NOPASSWD: ALL
renewhttps 와 ALL 사이는 반드시 탭문자로 입력해야 합니다.
새로 생성한 계정으로 로그인합니다.
sudo su - renewhttps

# pip3 install awscli
pip3 install awscli --break-system-packages

aws configure
AWS Access Key ID [None]: AKIA3V2XXXXXXXXXXXX
AWS Secret Access Key [None]: VD2v1vcPmGiYyRWXXXXXXXXXXX
Default region name [None]: ap-northeast-2
Default output format [None]: json
인증서 갱신 테스트
authenticator 를 dns-route53 으로 변경합니다.
sudo cat /etc/letsencrypt/renewal/example.com.conf
......
authenticator = dns-route53
인증서 갱신용 계정으로 로그인합니다.
sudo su - renewhttpsAWS 접속정보가 정상적으로 설정된 것을 확인합니다.
aws configure list
      Name                    Value             Type    Location
      ----                    -----             ----    --------
   profile                <not set>             None    None
access_key     ****************HZVD shared-credentials-file
secret_key     ****************eVvx shared-credentials-file
    region           ap-northeast-2      config-file    ~/.aws/config
아래 명령으로 확인되는 HostedZone Id 로 정책의 YOURHOSTEDZONEID 부분을 수정해 주어야 합니다.
aws route53 list-hosted-zones
{
    "HostedZones": [
        {
            "Id": "/hostedzone/XXXXXXXXXXXXX",
            "Name": "example.com.",
            "CallerReference": "3F501356-XXXXXXXXXXXXXXXX",
            "Config": {
                "PrivateZone": false
            },
            "ResourceRecordSetCount": 24
        }
    ]
}
_acme-challenge 가 있다면 Route53 에서 삭제해 줍니다.
dig TXT _acme-challenge.example.com
dig TXT _acme-challenge.example.com @8.8.8.8
아래처럼 성공 메시지가 표시되면 완료된 것입니다.
sudo certbot renew --dry-run --cert-name example.com -v
......
Congratulations, all simulated renewals succeeded:
......
리눅스 서비스 등록
위 명령을 실행하는 것으로 인증서 갱신 서비스가 등록됩니다.
sudo systemctl status certbot.timer하지만 서비스가 실행중이 아니면 아래 명령으로 서비스를 등록해 줍니다.
sudo systemctl enable certbot.timer
sudo systemctl start certbot.timer
certbot.service 를 등록합니다.
(루트로 실행되어야 합니다.)
sudo vi /lib/systemd/system/certbot.service
-----------------------
[Unit]
Description=Certbot
Documentation=file:///usr/share/doc/python-certbot-doc/html/index.html
Documentation=https://letsencrypt.readthedocs.io/en/latest/

[Service]
Type=oneshot
ExecStart=/usr/bin/certbot -q renew --no-random-sleep-on-renew
PrivateTmp=true
-----------------------
sudo systemctl daemon-reloadnginx 재시작
인증서 갱신 후 nginx 재시작이 필요한 경우 설정해 줍니다.
아래 명령으로 certbot 이 자동으로 nginx 를 재시작합니다.
sudo mkdir -p /etc/letsencrypt/renewal-hooks/post/sudo vi /etc/letsencrypt/renewal-hooks/post/reload-nginx.sh
-----------------------
#!/bin/bash
systemctl reload nginx
-----------------------sudo chmod +x /etc/letsencrypt/renewal-hooks/post/reload-nginx.sh주요 명령어
# 갱신 로그 확인
sudo tail -200 /var/log/letsencrypt/letsencrypt.log

# 현재 인증서 상태 확인
sudo certbot certificates

# 강제 갱신
sudo certbot renew --force-renewal
# sudo certbot --nginx -d skyer9.pe.kr -d *.skyer9.pe.kr